
AutoCAD (Computer-Aided Design) is an industry-standard drafting program used across architectural and engineering professions. This tool allows users to quickly and precisely draft plans, sections, and details more efficiently than by hand. While AutoCAD has 3D capabilities, this design critique will focus on interface elements and several 2D drafting tools.
Navigating the Model Space
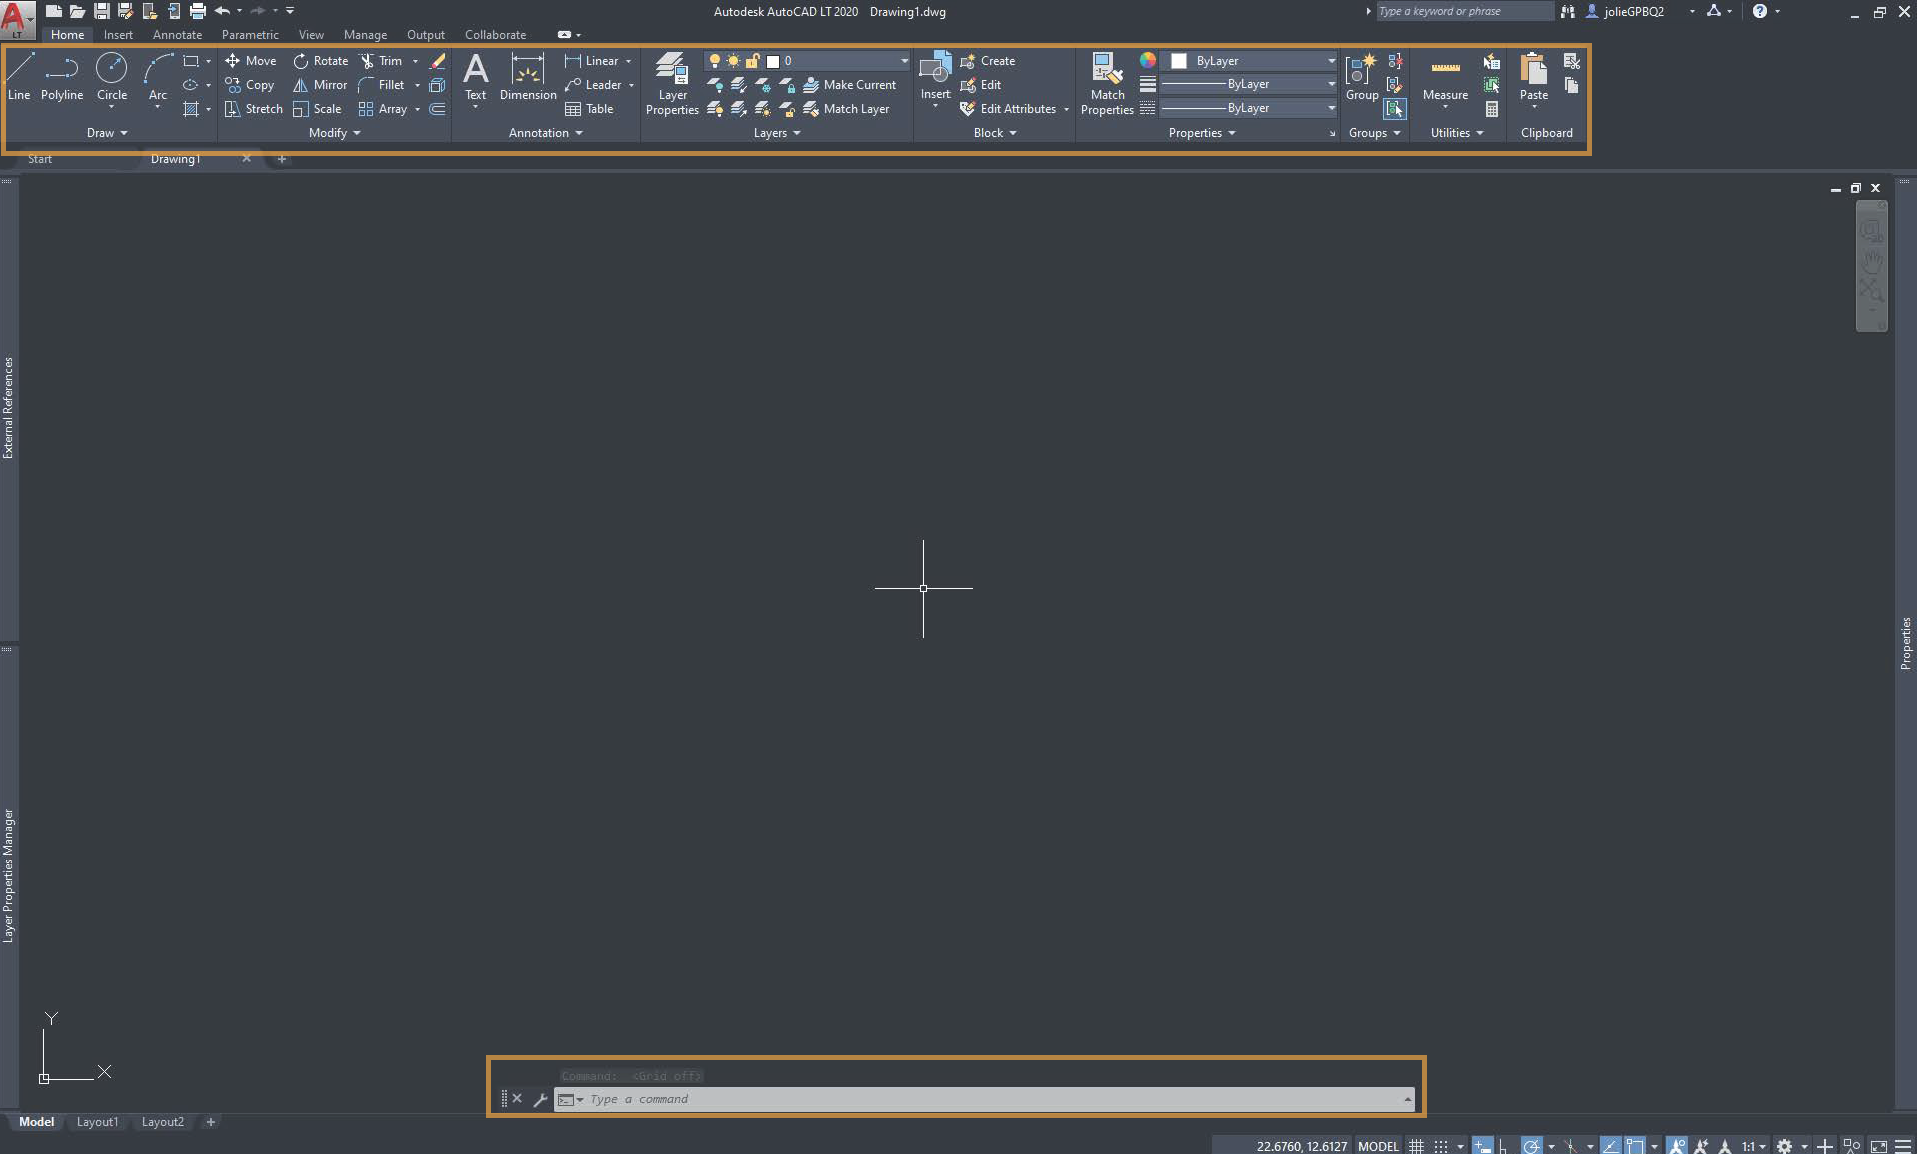
Upon starting a new file, users are presented with the “Model Space” with a “Ribbon” of tools across the top of the page as well as a command-line at the bottom of the screen, both outlined in orange, and your cursor is now a cross-hair as shown in Figure 1. The ribbon is divided into different kinds of tools (draw, modify, annotation, layers, etc.), with small triangles pointing downward, signifying a dropdown. The individual drawing tools are clearly labeled with icons that increase discoverability, allowing novice users to easily gain familiarity with possible actions you can take within the program. The command-line on its own relies on knowledge in the world to know that the bar along the bottom affords typing out commands, however, the developers chose to include the default text within the bar to say “Type a command” to signify to those who are not familiar that this program responds to typing out commands. As you are working within the program, the command-line also keeps a history of tools used, which is useful in tracking your process, especially when users make a mistake and want to “undo” up until a specific point.
Initially, I thought it might be beneficial to highlight the command-line with a unique accent color so it does not take up drafting space or conflict with any possible linework colors since I do not think it is noticeable to beginners. However, upon further reflection, I do not think this feature needs to be highlighted further since its presence does not hinder one’s ability to use it (in fact you can completely hide it), there is ample feedback at each step in using the tools (as discussed later), and it should not compete with the ultimate purpose of this tool: drafting.
Drawing in AutoCAD
Below are screenshots of a sequence to draw a circle using both the ribbon and the command line.
Steps to draw a circle
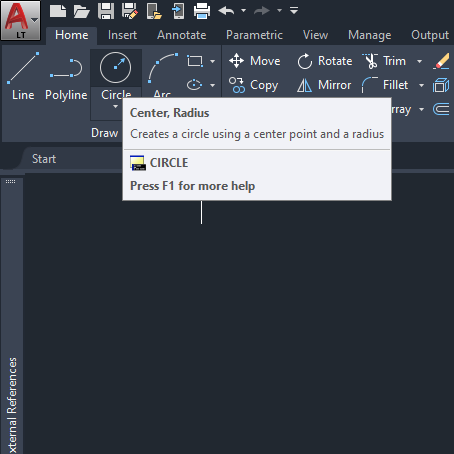
Step 1: Hovering on the circle icon darkens the whole button, signifying it is clickable. It then shows a small pop-up naming mode of drawing a circle it is in: center, radius. Below that displays “CIRCLE”, which is the command you can type to start this tool, and a prompt for additional help. The written description of using the tool is helpful in describing to a user how the tool is used.

Step 2: A long hover displays a diagram of actually using the tool. The green “x”s represents clicks and are numbered in order of executing the tool, while the red is the circle that the user is trying to draft. While the color-coding is not necessarily intuitive, based on knowledge in the world of basic geometry, a user can deduce what it means based on the description of the tool. The first “x” shown in the center [point] of the circle is the first click, and the second click sets the radius point.
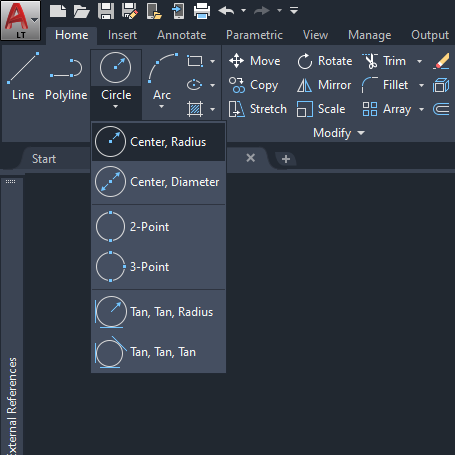
Step 3: While you can initiate the tool in its default “center, radius” setting by clicking on the circle icon, the drop-down accesses different modes for drawing a circle as shown with a brief description, which you can select by clicking. Mode error is reduced by the use of labels. All of the icons have fairly clear discoverability aspects built-in to them that also help users with understandability by acting as a guide to executing the tool. These informative icons are great at reducing rule-based mistakes just by a quick glance.
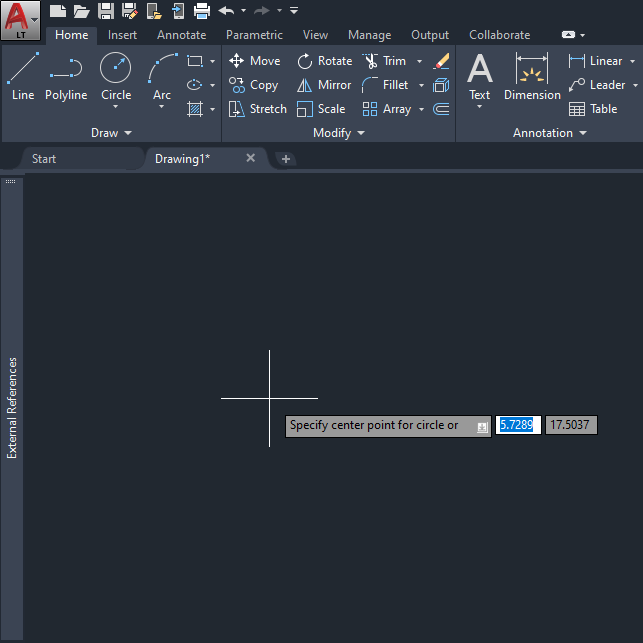
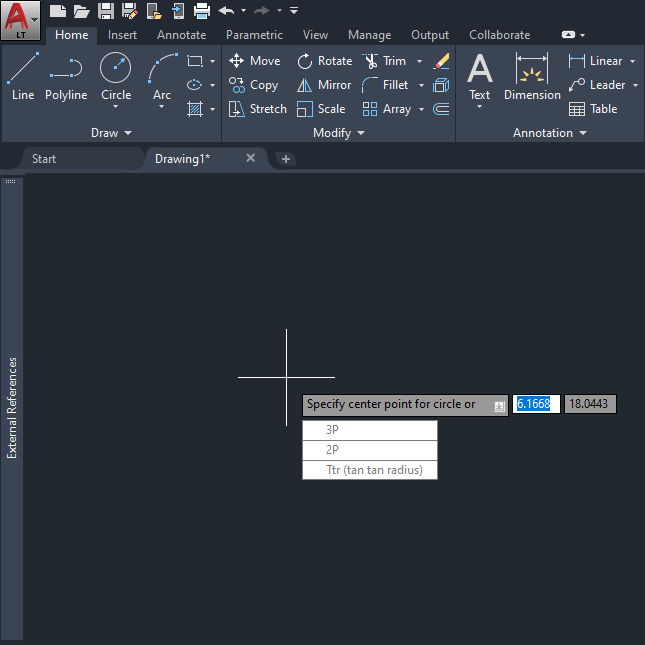
Step 4a: Clicking the icon immediately starts the Circle tool, and in the bottom left of your cross-hair is a prompt line that tells succinctly tells the user the next step in using the tool. There is a down arrow on the right of the prompt line that is mapped to the keyboard’s down arrow that accesses the tool options shown above, which will provide different options before the first click (2 point, 3 point, and tangent drawing options) and after the first click (center/diameter). Discoverability of this feature may not be apparent to beginners and can be easy to miss, so I think this experience can be improved by giving the icon a distinct color to signify that the command affords mode options.
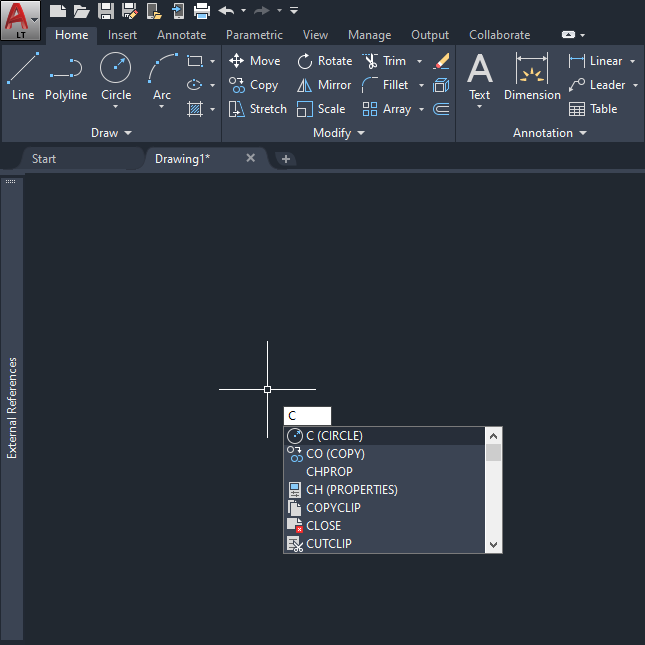
Step 4b: Users can also initiate the tool by beginning to type the word “circle”. Auto-complete options are then displayed next to the cross-hairs, which, intuitively, can be selected by pressing enter or clicking to select the intended tool. The same affordances are consistent throughout each tool no matter how the tool is initiated.
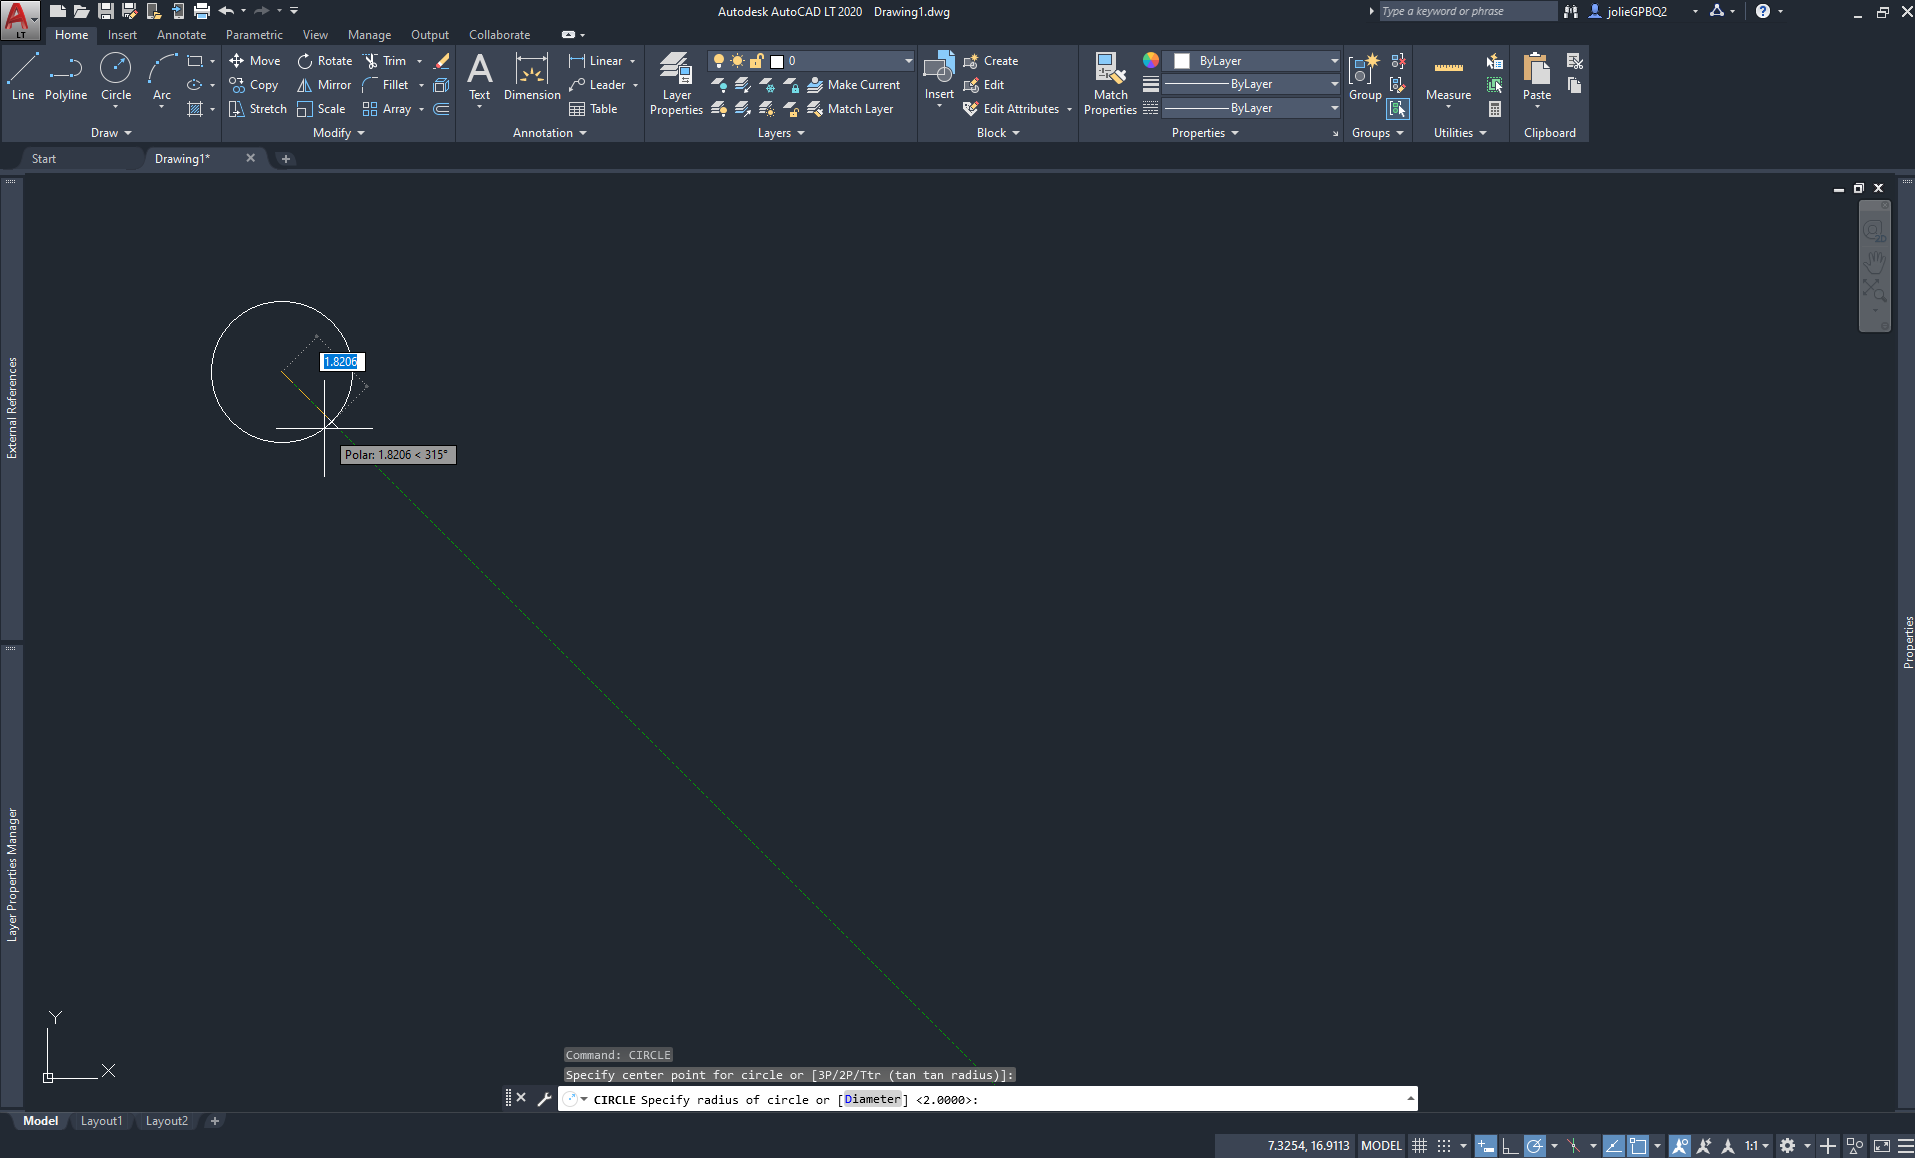
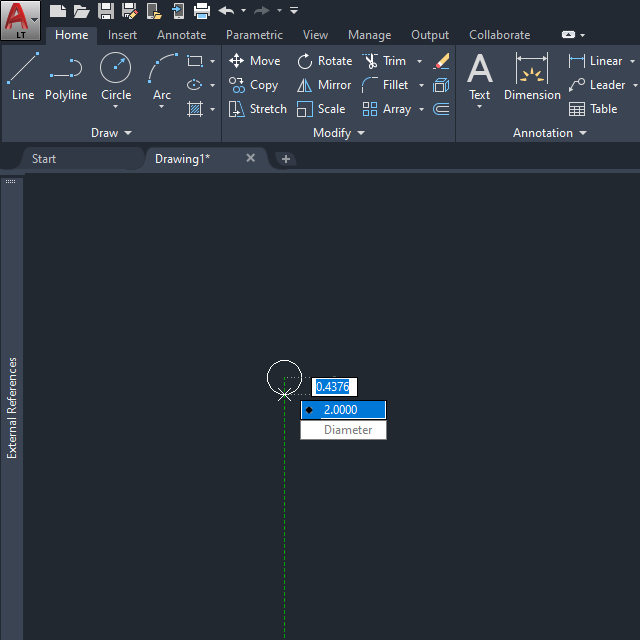
Step 5: Finally, after establishing the center point with a click and dragging the cross-hair to a second radius point, users will notice a small command line that tracks the cursor’s position in the model space highlighted in blue. This provides feedback that the radius has not been set yet, and users will continue to see the circle grow and shrink until a second click completes the command. However, another way to complete the command is to type a value for the radius, which may be signified by the highlighted value that tracks. Knowing that this is an option comes with understanding the conceptual model of AutoCAD as a program. At its core, using AutoCAD requires selecting a tool and inputting specific dimensions to draft shapes that represent things in real life. Once users understand that and see the guide of using the tool (e.g. as outlined above), it becomes intuitive at which step in the tool where you can begin inputting values and dimensions. The command line at the bottom of the screen also provides feedback on which tool you are using, which step within the tool you are in, and what the options are within the tool.
Congratulations, You’ve learned to draft a circle!
Commands & Slips
AutoCAD provides great feedback at every point in executing a command or tool through its completion, which is a helpful feature to reduce the number of slips. Since there are over 150 unique commands and remembering the sequence in completing each over them perfectly, every time is unrealistic. The challenge for novices is that learning AutoCAD relies heavily on recall from simply memorizing commands and how they work, which is why navigating tools through the ribbon is effective. Experienced users draft through commands and shortcuts for efficiency, but as Norman points out experienced users are more prone to memory slips (e.g. typing the wrong command) because knowing the commands become subconscious. Sometimes the command does not necessarily match the verb you would associate with the command (e.g. divide, break, split).
Even though the tools provide different options for drafting, they are prone to mode-errors because the options are accessed through the tool. Once a mode is selected, there is no reference to which mode you entered, which becomes a challenge if users are distracted mid-command. However, these slips tend to only happen with less common commands or tools, in which case, accessing tools through the ribbons, like a novice would, can address this issue.
Overall, with different options to initiate tools and all of the points of feedback incorporated along each step of using a tool, I think AutoCAD is set up in a way that helps beginners learn how to use it automatically built-in. A command simply will not execute if the steps are not performed properly, and if users make an action-based slip, there is a command to undo. While errors in this program are not lethal, Norman’s swiss cheese metaphor to reduce accidents and errors comes to mind, where redundancy helps users execute tools properly no matter their skill level.